Do you know what concentricity is? How about unfurling the bead? Reverse drop center adapter, perhaps? Better yet, ask your team what they mean and see if they can answer you. What’s the common denominator? They all have to do with dismounting and mounting a tire – the correct way.
Rim clamp and pedestal tire changers differ significantly in their dismount/mount techniques. Below are the procedures that you can print out and post near the tire changer to help your newer employees to remember the steps until they get proficient. In both cases, have a TPMS service pack chart, lug nut torque chart, replacement sensors and an updated TPMS programmer near the tire station. Technicians should know that they should not start the job until they have the tools and parts ready to go.
Demounting with a Rim Clamp
Start by installing plastic protectors on the clamps, the side shovel bead breaker and the pry bar. To break the tire bead off the wheel bead seat, start the bead breaking process either 90-degrees or 180-degrees from the valve stem or sensor, if present. Never press at the valve stem or sensor. Once the bead is broken, peek behind the tire bead to check for a band-mounted sensor as well the drop center position.
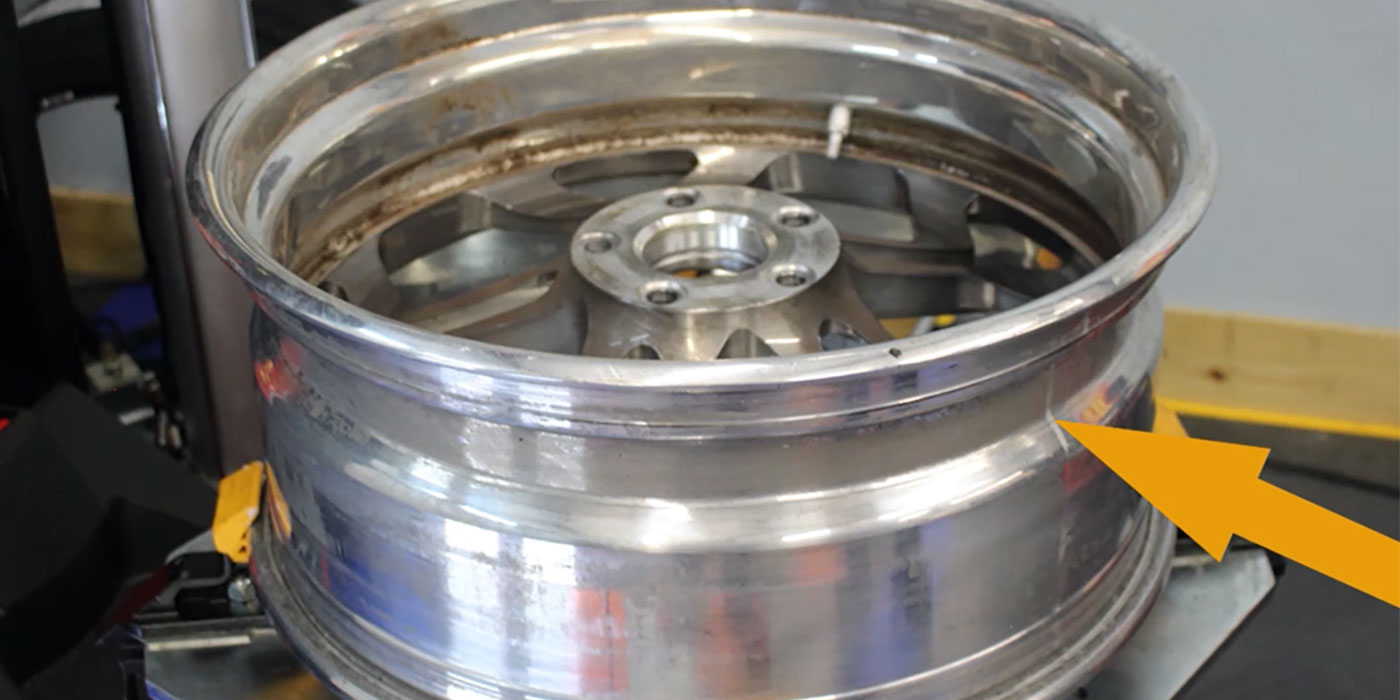
Open the clamps to the out position and then place the wheel inside the clamps with the drop center toward the top.
- A standard drop center requires tires to be removed over the front flange.
- A reversed drop center requires tires to be removed over the rear flange.
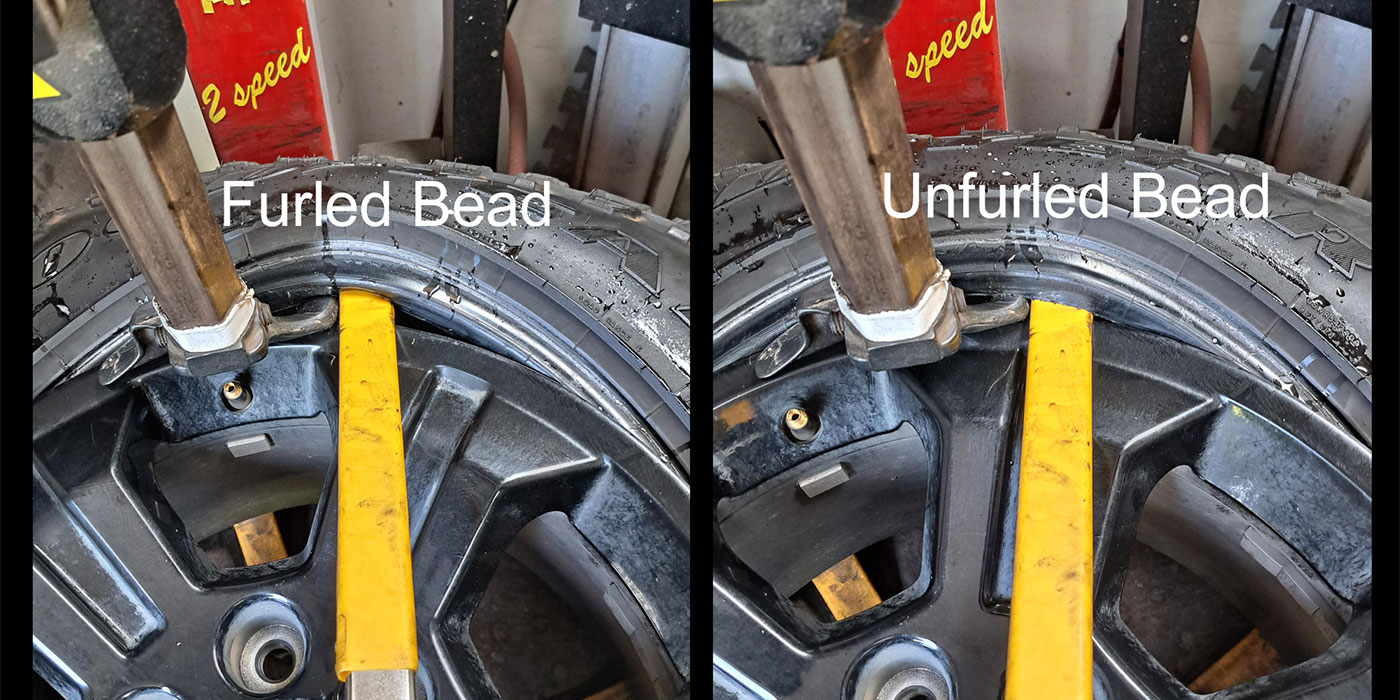
Close the clamps onto the wheel flange. Next, align the duckhead with the sensor, if present, or valve stem for consistency. Using the pry bar, work the top tire bead over the duckhead. Steel sidewall or low-profile tires may require you to make a rowing motion with the pry bar to gently pull the upper bead over the duckhead. Once the tire bead is above the duckhead, rotate the tabletop in reverse allowing the tire bead to unfurl and the innerliner to lay on top of the pry bar.
Now you can rotate the tire forward to remove the top bead. Rotate the tabletop so that the sensor is back under the duckhead. Slide the pry bar down and catch the bottom tire bead. Lift the tire up just below the pry bar and then lift the opposite side of the tire to place the bottom tire bead into the drop center, which allows the pry bar to pull the bottom bead over the duckhead. Rotate forward to remove the bottom bead.
Tech Tip: If you have a steel sidewall tire, use the unfurling technique above to catch the bottom tire bead on the duckhead to pull it off.
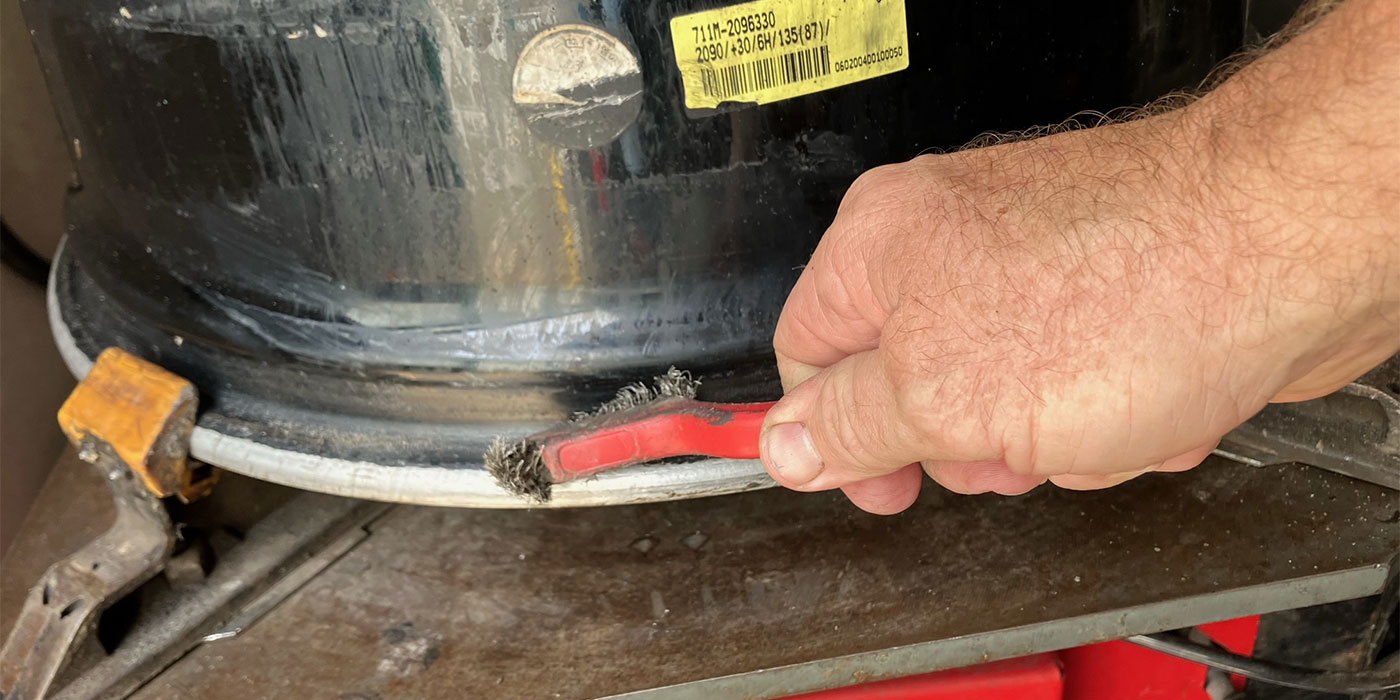
Lastly, clean the bead seat areas of all debris using a steel wire brush.
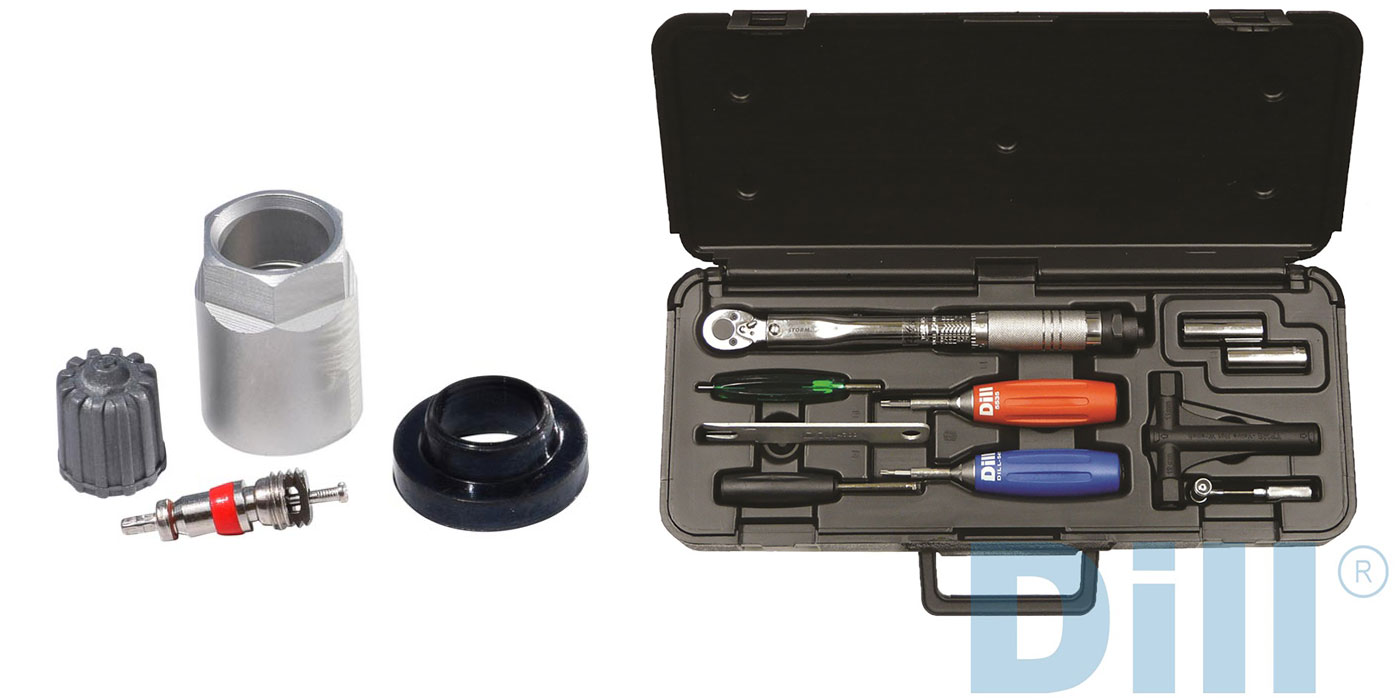
Referencing the TPMS chart, replace the TPMS service pack by using a T-10/T-15 Torx bit or 11mm/12mm socket and mini torque wrench set to the proper torque value. If you are replacing a traditional bolt-in metal valve stem, you will need a ½-in. or 9/16-in. open-end wrench or socket. Choose the correct grommet depending on the valve hole size of either .453-in. or .625-in. diameter. Tighten the nut(s) up until the grommet has a slight bulge to seal the gap, but don’t over torque it.
Mounting with a Rim Clamp
Lube up the tire beads with an approved Euro paste or liquid soap with a rust inhibitor. Do not use dish detergent. Also, lube the innerliner near the upper bead as well as the wheel bead seats and the transition on the wheel so that the tire bead can easily slide down the barrel. Locate the sensor or valve stem opposite the duckhead. Place the bottom tire bead over the rim flange so that the sensor is slightly in front of the traction point, which is where the tire crosses over the wheel flange. Using this technique causes the tire bead to drop over the flange right at the sensor, which will avoid hitting it. Rotate the tabletop to position the sensor in the same location and repeat the process. If the upper tire bead tries to ride up onto the wheel bead seat, use a helper arm or manual bead depressor to keep the bead into the drop center.
Once the tire is on, remove the valve core so that you can get high air flow through the valve stem. As the beads start to catch on the safety humps and pressure increases, release the clamps so that the lower tire bead doesn’t get caught in the clamps. Never exceed 40 psi to seat the bead unless the tire is in a safety cage. Once the tire beads have popped onto the wheel bead seats, pull the inflator hose off and let the tire completely deflate. This allows the tire bead to shrink onto the wheel bead seat, called concentricity. That means that the tire bead is now round with the wheel bead seat. If you ignore this and use a RoadForce balancer, the balancer can indicate that the tire has excessive road force, when in fact a “cam lobe” or high spot was created during the mounting process.
Demounting with a Pedestal Tire Changer
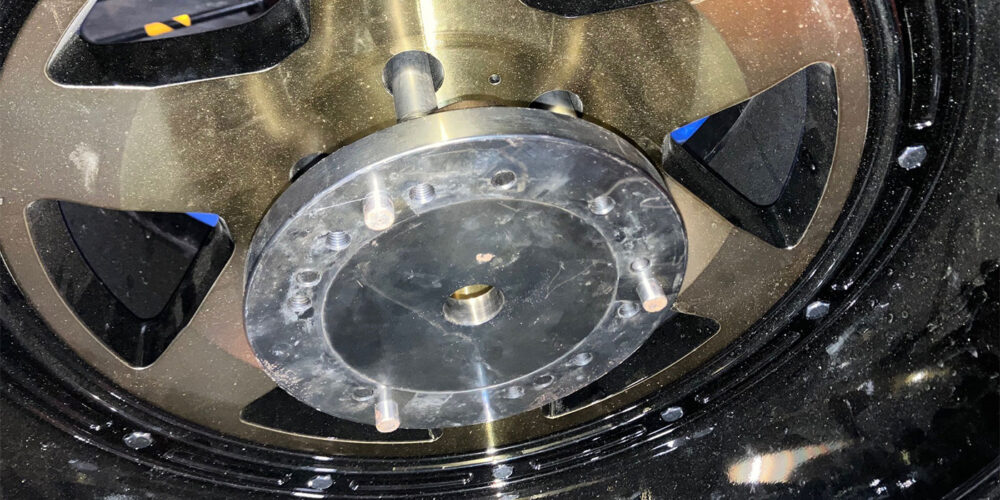
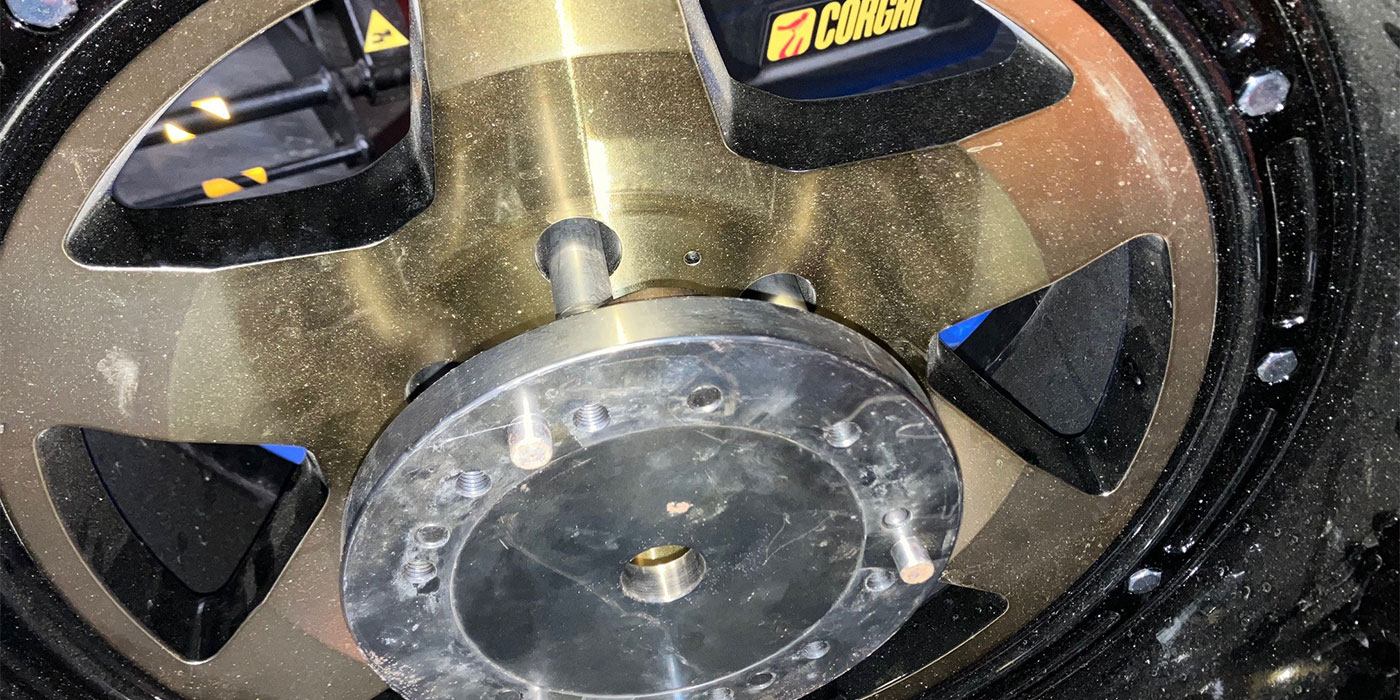
When using a pedestal tire changer, use the pistol tool to secure the wheel through the centerbore. Use the plastic covers to protect the wheel finish. For reversed mount wheels, be aware that you will need to install a reversed wheel adapter through the lug holes to position the wheel upside down.
Also, if you have a chrome clad wheel, such is common with many Dodge/Chrysler vehicles, you will need to use a chrome wheel adapter to secure the wheel through the lug holes instead of the centerbore. Once secured, use the roller(s) to break the tire beads loose per the equipment manufacturer’s instructions. Using the demount head, remove the tire beads as before.
Mounting with a Pedestal Tire Changer
Position the sensor as before and rotate the pedestal while the mount head is positioned to install the bottom bead. Reposition the sensor and install the upper tire bead. Use the upper roller and helper arm to keep the tire bead in the drop center as the tire rotates. Inflate the tire until the beads pop with the same cautions as a rim clamp. Deflate the tire as before and reinflate to proper pressure.