A gen one cartridge or a press-fit wheel bearing takes a lot of time to install, and it’s hard to perform this service on flat rate if you don’t know what you’re doing in the first place. So what are some of the big mistakes that we see in our industry when technicians try to install one of these?
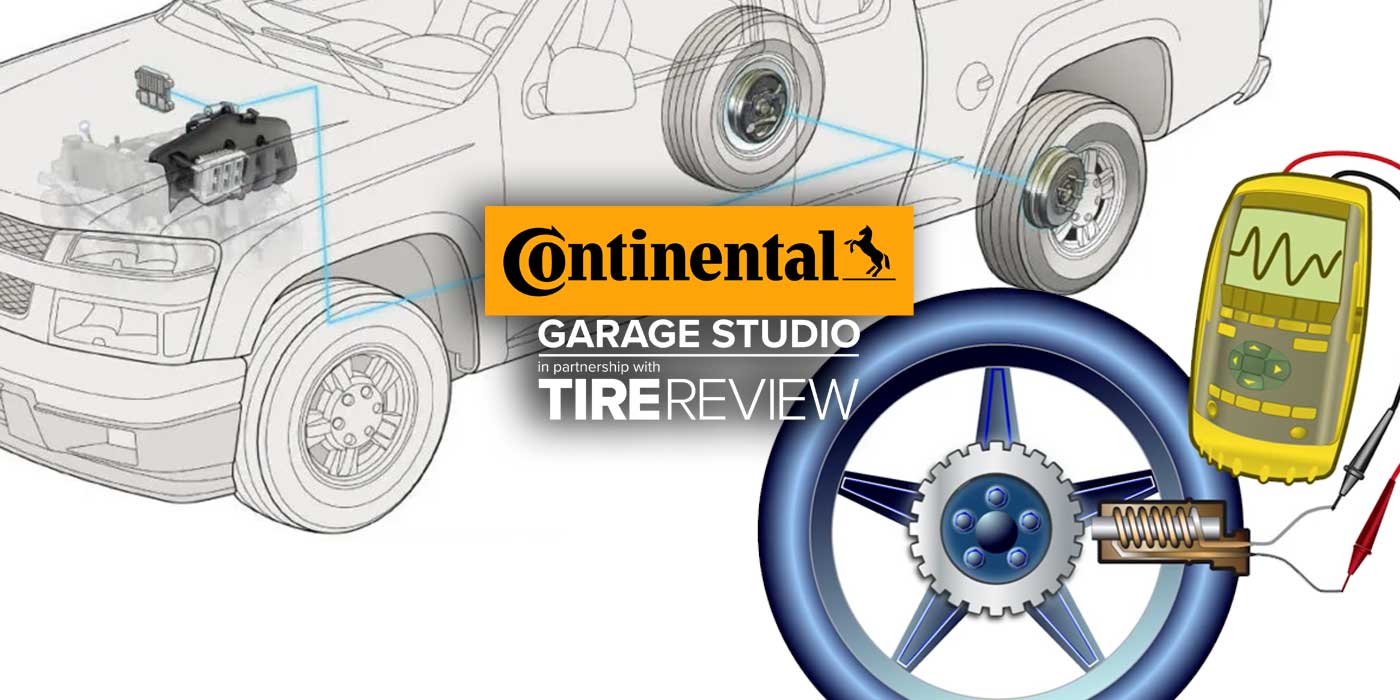
Well, first is disassembly. That can be a nightmare with the snap rings, rust and corrosion. Getting it apart is always going to be a challenge. But when you go to reinstall it, the number one thing that we see as an error is most of the applications are going to have a magnetic encoder for the ABS. The other side may look the same or have a metal shield on it, but orienting it the right way – in towards the engine or out towards the wheel – is going to cause an ABS light to come on or stay off. That’s the number one issue with installation.
For newbies, their main concern is if they’re installing it properly when they’re first doing the job.
Before they start dissembling, they should take an assessment to see if they need just the bearing or if it needs repaired. In a lot of cases, you’re going to take the dust cap off, you’re going to see an axle, and if it’s corroded beyond belief you’re going to see that the wheel flange is completely rusty as well, and maybe pitted. The snap ring that retains the wheel bearing cartridge into the knuckle is going to be rusted and probably will break when you take it apart. So in the rust belt, be careful to make sure you’ve got all the parts that you may need to do the job.
Keep in mind that the rust belt is also the pothole belt. A good question to ask is: Should a technician be concerned about the knuckle itself (as well as the bore it goes into) being square or having other issues?
Generally not. The chances are slim that the pothole is going to distort the hole that goes into the knuckle. There might be other damage on other parts of the knuckle, but generally, what you’re going to see is rust pitting. Depending on if it’s a metal or steel knuckle that it’s coming out of, you might have some material transfer, so the new bearing might go in looser. Be cognizant of that too. Once you get the bearing pressed out, just take a look and see if there are any big pits or cracks or any kind of distortions that might raise some alarms.
One tip to remember is that when you get started on the job, look at the press or the kit you have for doing it on the vehicle and make sure that everything is there before you start tearing that vehicle apart and disabling it in the bay.
So, how do technicians know if the encoder ring is facing the correct inboard or outboard?
Well, the easiest way to know, if you don’t have any magnetic cards or any of the high-tech stuff, is to take a simple paper clip, anything that’s going to be metal, and attach it to the magnetic encoder. If it sticks, that’s the side that you want to be facing the wheel speed sensor. The other will just fall off.
If you don’t have a paper clip, some iron filings on there might work. The No. 1 one key is if you get the bearing in, you reinstall and press in the wheel flange into it to the same depth that it was when it came out. Take a look and see that flange stops and maybe take some measurements, take some pictures, just to be sure until you get familiar with it and comfortable doing that type of job.
But you may be asking: If I install it backward, can I just turn it around and take it apart?
No. Once you go to uninstall it, the bearing will separate and it’s no good, and you will destroy it taking it back out.
These Gen 1 wheel bearings are typically found on Ford, Toyota, even some Nissan vehicles.
This video is sponsored by BCA Bearings by NTN.