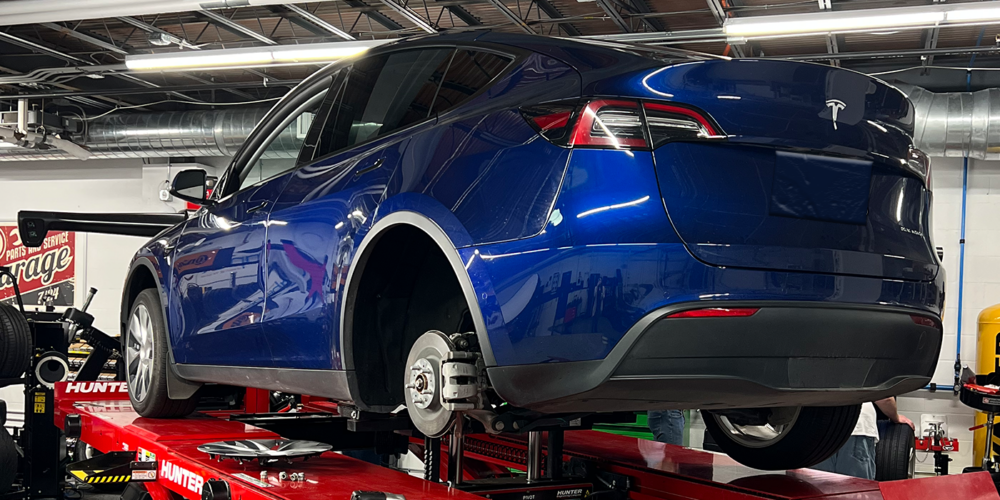
 Air springs and electronic ride controls provide a cushy, boulevard ride, but the ride doesn’t last forever. All air suspensions share a common vulnerability: air leaks. And when a system can no longer hold air, it goes flat.
When an air ride suspension system goes flat, it can be very expensive to fix. OE parts are sky high and may not even be available for some of the older applications. Remanu-factured and new aftermarket electronic air struts and compressors can provide a more cost-effective alternative for those who want to retain the full functionality of their air ride suspension.
The other option is to replace the original air springs and/or electronic struts or shocks with a conversion kit that includes conventional coil steel springs with ordinary struts or shocks.
Conversion Kits
On a Lexus, the OE air struts list for $950 per wheel! If the compressor also needs to be replaced, the parts bill alone is around $5,000. By comparison, a conversion kit for this vehicle typically sells for less than $800 and includes struts for all four wheels.
Make sure the customer understands how this conversion will change the ride quality of his or her vehicle. Chances are the spring and shock combination will feel very aggressive to some drivers.
One other change that is usually required when converting an air ride suspension is to disable or “fool” the system module. Procedures vary depending on the application, but may require removing a fuse, cutting a wire or splicing a resistor into a strut wiring harness to trick the module into thinking a solenoid or height sensor is still there when it is not. Make sure to review the conversion kit’s instructions or check other sources like manufacturer TSBs. Not following the proper procedures can affect other systems controlled by the body control module.
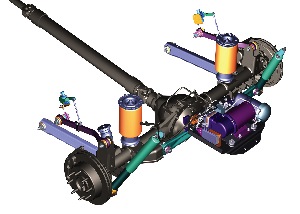
Air Ride Basics
With an air ride suspension, hollow, inflatable rubber bags (air springs) are used in place of ordinary coil steel springs or leaf springs. The rubber bags are flexible and have a certain amount of give, so they help absorb and dampen bumps to better isolate the suspension from the vehicle’s occupants. Air springs also provide a variable spring rate and offer increased stiffness the more they are compressed.
On some vehicles, an air bladder is incorporated into a strut or shock to provide additional dampening and/or ride height control. Air shocks are one such example, and are often used on the rear for automatic load leveling. On some applications, a strut may have both a conventional steel spring with an additional air bladder on top to vary ride height and/or spring stiffness.
On many applications, the air ride system may remain active for a certain period of time after the engine has been turned off. The system continues to monitor ride height and may make corrections by adding or venting air as needed. There may be a built-in delay so the corrections do not occur immediately when the occupants exit the vehicle or unload the trunk.
Understanding the operating logic of an air ride suspension system is important when trying to make a diagnosis because all of these systems are different. If you don’t understand the logic, you can’t always tell if the system is functioning correctly or not.
Air Ride Problems
Air suspension problems fall into one of three categories:
Electrical – Problems with the height sensors, air spring solenoids, module control circuit, compressor relay, compressor or vent solenoid. These can be isolated by using the system’s self-diagnostic procedures (if available) and various volt/ohm checks. Service consists of replacing the faulty component or wiring, or readjusting the height sensors.
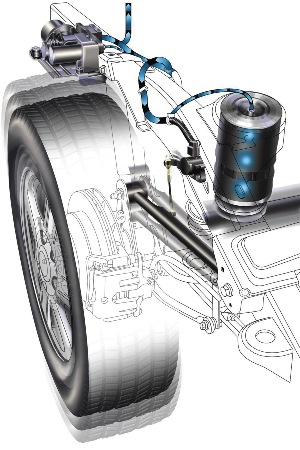
Air supply – Leaky or obstructed air lines, faulty compressor or spring solenoids. Diagnosis is made via the self-test and visual inspection. A bad compressor or solenoid must be replaced, but damaged air lines can be repaired by splicing.
One of the leading causes of compressor failure is air leaks (usually in the air springs or lines). If the compressor is constantly running, it’s going to work itself to an early death. If you’re replacing a compressor, the dryer should also be changed to protect the new unit from moisture.
Air springs – Leaking, damaged, deflated or unfolded springs. Damaged springs must be replaced as an individual assembly (replacement in pairs is not necessary with air springs). If unfolded, the spring must be carefully inspected for cuts or cracks before it is reinflated.
Replace the Dryer
It is very important to ensure that the source of air for the compressor is clean and as dry as possible. When air is compressed, the water vapor contained in the air is condensed into a liquid. If there is no means of removing the water from the system, it will find its way to all parts of the system, causing corrosion damage or freezing.
Most systems have a dryer that is connected to the compressor outlet to absorb the water entering the system. The dryer contains a moisture-absorbing desiccant such as silica gel. The desiccant can hold a given amount of water and once it is saturated, it will allow water to pass into the system.
The dryers that are installed on most systems do not have an indicator that will show when it is saturated and no longer able to absorb water. An additional dryer with a moisture indicator can be added to the original equipment dryer. It can be installed in the supply line and placed in a position where a periodic check can be made.
Alignment
Ride height can also affect caster. A deflated air spring or defective ride height sensor can increase caster readings by up to a degree or more. Jacking up the front of a vehicle or dropping the nose will have the opposite effect and reduce caster readings. This may contribute to a steering problem, such as instability or poor steering return. That’s why ride height and the condition of the air suspension system should always be measured prior to checking wheel alignment.
Real-World Example: SUV Air Suspension
Problem: GM mid-size SUV air suspension will not return to full ride height.
Diagnosis: The Electronic Controlled Air Suspension (ECAS) compressor was running, but the back end would not return to normal ride height.
Root Cause: Compressor check valve sticking in the compressor housing, not allowing the compressor to build pressure and raise the rear.
Solution: GM has an ECAS Compressor Service Kit, P/N 15183676, to fix the problem. Do not replace ECAS compressor.
Applicable Vehicles: 2002 GMC Envoy/Envoy XL (new body style) with electronically controlled air suspension (RPO G67); and 2002 Oldsmobile Bravada (new body style).
Repair Procedure
Important: Do not replace ECAS compressor
Caution: A sudden release of pressure may cause personal injury or damage to the vehicle. The air suspension system is under pressure until the air supply lines are disconnected. Wrap a clean cloth around the air supply lines.
Important:
• Depressurize the air suspension system only after the rear axle is supported and is set between D-height and full jounce.
• Remove the air suspension system fuse before working on the rear suspension components or the rear axle. Failure to remove the fuse could cause the calibration of the air suspension leveling sensor to change and the air suspension system to not function properly.
1. Remove the #1 30-amp ECAS fuse from the UBEC.
2. Lower the spare tire.
3. Raise and support the vehicle.
4. Remove the air spring compressor to frame mounting bolts.
5. Disconnect the air inflator switch electrical connections, the air supply lines and the air spring compressor vent hose from the air spring compressor.
6. Remove the air spring compressor from the vehicle.
7. Clean the cylinder head area with brake cleaner and air.
8. Remove the air compressor valve cylinder head screws using a T25 Torx bit and remove the cylinder head.
9. Remove the O-ring, the spring and the check valve.
10. Clean the old thread locking compound from the aluminum body tapped holes using a M5x0.8 thread cleaning tool.
11. Clean any foreign material away from the sealing area.
Important: The new check valve and O-ring come pre-greased. Do not add additional grease. The groove in the cylinder head must be installed facing the compressor in order to properly retain the O-ring.
12. Install the new pre-greased check valve, the spring, the O-ring, the cylinder head and the screws from the service kit, P/N 15183676. Tighten the cylinder head screws to 5 Nm (44 lb.-in.).
Important: Ensure that the color on the air supply lines matches the color on the air spring compressor for reassembly. The right side is clear and the left is black.
13. Install the air supply lines with existing fittings to the compressor. Torque to 18.5 lb.-in.
14. Connect the air inflator switch electrical connections, the air supply line and the air spring compressor vent hose to the air spring compressor.
15. Install the air spring compressor to frame mounting bolts. Tighten to 18 lb.-ft. Inspect the rear air springs for proper seating before inflating the rear air springs.
16. Lower the vehicle.
17. Install the #1 30-amp ECAS fuse in the UBEC.
18. Start the engine and run for approximately one to three minutes to ensure that the air spring leveling system is functioning properly.
19. Inspect the D-height.
20. Inspect for air leaks.
– Alldata’s Eric Seifert