ther. “Thrust angle alignments also identify vehicles that would ‘dog track’ going down the road with the rear end offset from the front,” Tire Rack says. “If the thrust angle isn’t zero on many solid rear axle vehicles, a trip to a frame straightening shop is required to return the rear axle to its original location.”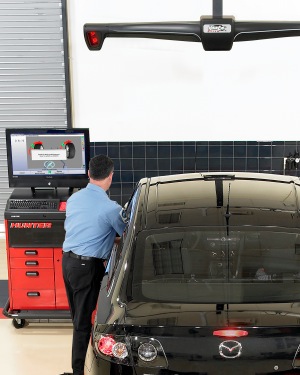
Vehicles with four-wheel independent suspensions or FWD vehicles with adjustable rear suspensions require a full four-wheel alignment. This type of alignment “squares” the entire vehicle (as with a thrust angle alignment), and also includes measuring and adjusting the rear axle angles as well as the front, according to Tire Rack experts.
Note: “Not all vehicles are easily adjustable or fully adjustable,” Tire Rack says. “Some vehicles require aftermarket kits to allow sufficient adjustment to compensate for accident damage or the change in alignment due to the installation of lowering springs.”
Alignment Measurements
There are four key measures to each alignment: caster, camber, toe and thrust angle. Because this is a Back2Basics article, we are not going to get too deep into the explanations, driver desires or options here; more advanced explanations are available from many resources.
• Camber: This suspension angle shows how the tire angles away from 0 degrees vertical when viewed from either the front or rear of the vehicle. Expressed in degrees, negative camber means the top of the tire tilts toward the center of the vehicle, while positive camber means the top of the tire tilts away from center. A visual cue for a camber problem is excessive tire wear on the inner or outermost ribs.
• Caster: This angle shows the forward or backward slope of a line drawn through the upper and lower steering pivot points, when viewed directly from the side of the vehicle. Also expressed in degrees, caster is measured by “comparing a line running through the steering system’s upper and lower pivot points (usually the upper and lower ball joints of an A-arm or wishbone suspension design, or the lower ball joint and the strut tower mount of a McPherson strut design) to a line drawn perpendicular to the ground,” Tire Rack experts say. “Caster is said to be positive if the line slopes toward the rear of the vehicle at the top, and negative if the line slopes toward the front.” A visual cue for a caster problem is serious tire scrub laterally across the tread face.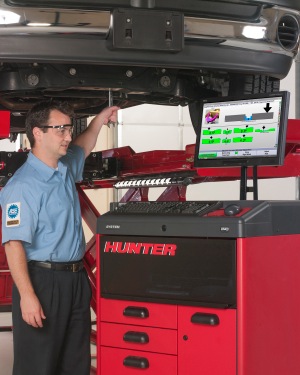
• Toe: Identifies the direction tires are pointed relative to the centerline of the vehicle, when viewed from directly above. Toe can be expressed in either degrees or fractions of an inch. When looking down upon a vehicle, “toe-in” is when the leading edge of the tire is pointed toward the centerline of the vehicle. Conversely, “toe-out” refers to a tire face which points away from the vehicle centerline. “The toe setting is typically used to help compensate for the suspension bushings compliance to enhance tire wear. Toe also can be used to adjust vehicle handling,” Tire Rack experts say.
• Thrust Angle: Consider an imaginary line drawn perpendicular to the rear axle’s centerline. This measure, expressed in degrees, compares the direction that the rear axle is aimed with the centerline of the vehicle. Thrust angle also confirms if the rear axle is parallel to its front axle and that the wheelbase on both sides of the vehicle is the same. “If the thrust angle is not correct on a vehicle with a solid rear axle, it often requires a trip to the frame straightening shop to correctly reposition the rear axle,” Tire Rack says.
Note: There are a variety of reasons for any of these alignment measures to be incorrect. At the same time, adjustment angles can be adjusted by a skilled technician to correct for inherent vehicle problems, correct for unusual tire wear, or to improve the performance and feel of a vehicle.
Alignment Specifications
All vehicle manufacturers have set specific alignment specifications for each of their vehicles. These are the “preferred” angles for camber, caster and toe (with preferred thrust angle always being 0 degrees). OEMs also provide the acceptable “minimum” and “maximum” angles for each specification, and are usually within plus or minus one degree of the preferred angle.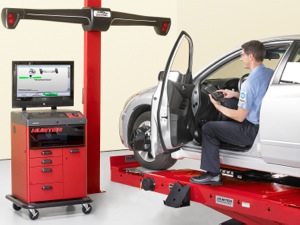
Total Alignment Procedure
As with most vehicle service procedures, any alignment must start with a test drive. Don’t take the owner’s word for a condition or even your “gut” take on the situation (regardless of your experience). Look for telltale symptoms, like a steering wheel that is off-center, pulling in one direction, vibration when driving, tire squealing on low speed turns, etc.
• Depending on your alignment equipment, enter the vehicle year, make, model and design into the system’s computer to determine the OEM’s alignment specifications. That data will be compared to the vehicle’s actual alignment status to determine necessary corrections. Some systems allow you to simply scan the VIN to recall specs.
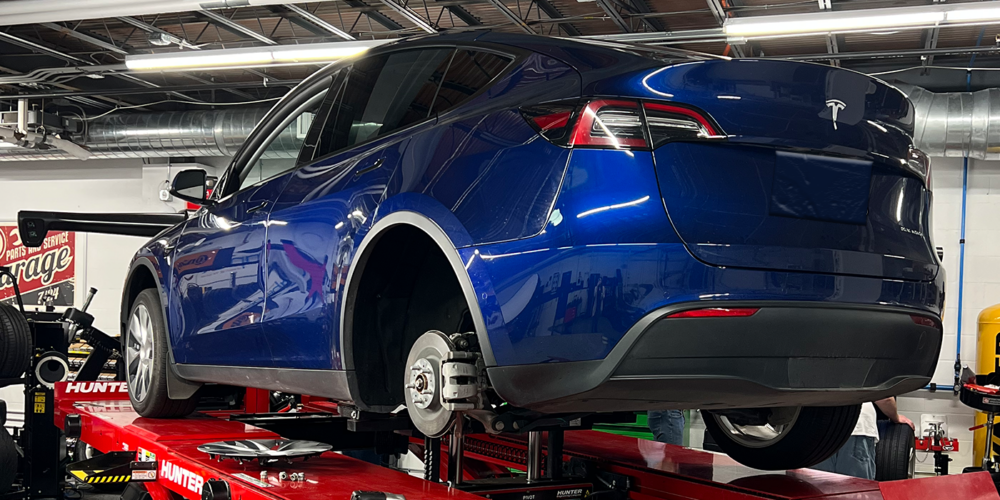
• Next, drive the vehicle onto your alignment rack. Chock wheels and raise lift to a comfortable and safe work height, then lock the rack. Lift the vehicle by the center jacks of the alignment rack, suspending the wheels. This will allow you to check tires for uneven, irregular wear, as well as to visually check the front-end and rear axle for any compromised suspension or steering components. If there is a bad ball joint, tie-rod end, broken coil spring, loose wheel bearing, or any other problem with the suspension or steering, the component needs to be replaced before the alignment is performed.
• Next, check and adjust tire pressures to OEM specification; some systems have an automatic inflation feature. Remove hubcaps if present.
• Mount targets to wheel ends as required by the rack manufacturer. Most alignment racks require the alignment heads be attached to all four wheels, even if no adjustments are made to the rear wheels. With many FWD vehicles, adjustments can be made to the rear and should be performed before the front wheel alignment adjustments are made.
• Depending on your alignment equipment and system, there are unique procedures that will measure the current camber, caster and toe angles of the vehicle and report that information either on a print-out or on a diagnostic screen. Some systems even print a “symptom report” that you can show the customer, which explains the potential damage to tire health if alignment issues are not corrected.
• As previously mentioned, if the rear alignment needs to be adjusted, this has to be performed before working on front-end adjustments.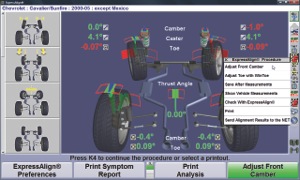
• With front-end alignments, correct caster and camber adjustments first. Certain FWD vehicles do not offer caster adjustments, but correcting the camber may bring the caster within specs. Refer to the alignment machine instructions (or a repair manual) for the specific vehicle to perform the correct caster and camber adjustments.
• With caster and camber adjusted, then adjust toe angles.
• Restart the car, remove the steering wheel lock, turn the steering wheel back and forth a couple times, then re-center and replace the steering wheel lock. Recheck alignment specifications, and then readjust angles as necessary.
• Remove the alignment heads and lower the vehicle.
• Complete the alignment by taking a test drive to ensure any previously noted symptoms are gone or can be attributed to other vehicle issues (such as vibrations caused by worn suspension parts).
Note: Again, every alignment system maker has its own unique process. It is important that you follow their specific operating instructions.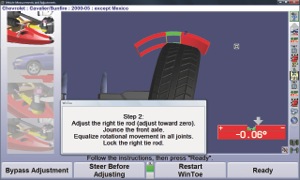
Alignment Adjustments
Modern vehicles have few built-in adjustments for camber or caster. Extra parts and labor may be required to bring the vehicle into the recommended specifications. Some vehicles even require new “plus” or “minus” control arms to complete an adjustment. Make sure to look up parts and labor prices before consulting the customer for approval.
• Hunter’s WinAlign alignment software uses a feature called ExpressAlign to analyze each job and present the optimal action sequence with the minimum steps required. ExpressAlign also will indicate any aftermarket kits that are required to perform the alignment. For example, a 2011 Chevy Malibu’s alignment measurement might indicate the need for left rear toe adjustment and will lead to the need for a left front toe adjustment.
– In this case, ExpressAlign would indicate that the left rear toe problem must be addressed first. Rear wheels are always adjusted first to establish a reference point for front wheel adjustment.
– Rear left toe corrected using tools provided by WinAlign.
– Left front toe can be corrected using Hunter’s WinToe, a tool that ensures a straight steering wheel without repeated front toe adjustments or the use of a steering wheel holder, which can become loose during front toe alignment. 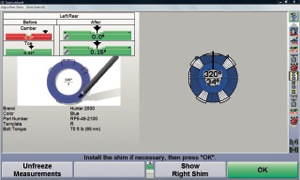
• Steering Angle Sensor Reset: a growing number of OEMs now require reset in conjunction with alignment service to ensure the driver-assist systems perform properly after a change to a vehicle’s steering angle geometry.
– Hunter’s CodeLink tool plugs into the vehicle’s OBD-II port and displays on-screen instructions that incorporate reset steps into the alignment procedure.
– CodeLink works with alignment sensors to ensure front wheels are adjusted correctly for proper SAS reset, reducing the possibility of errors that may result in customer comebacks.
– CodeLink replaces multiple OEM scan tools and eliminates the interview process between tool and technician; it also provides the vehicle owner with a printout that confirms the reset was completed properly.
- CodeLink automatically incorporates yaw, torque and lateral pull measurements into its steering angle reset requirements. 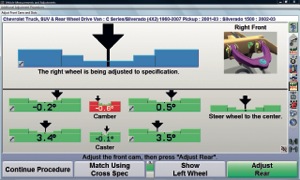
Failing to reset or recalibrate the steering angle sensor can result in damage to the steering components, as well as compromising the operation of the ABS and ESC systems.
Summary
Proper wheel alignment is not only important for vehicle safety, it also saves money by prolonging tire life. Driving 12,000 miles with toe misalignment of only 3/16-inch is equivalent to dragging the tires sideways for 68 miles. That is not good for tire life!
Drivers should be encouraged to follow wheel alignment recommendations in their vehicle’s owner’s manual, but as a general rule, wheel alignment should be checked at least once a year.
Disclaimer
Vehicle alignment is a serious business. The preceding article was researched and written using material furnished by Hunter Engineering, Tire Rack and other industry sources. This information is not meant as a substitute for proper training by Hunter or other alignment equipment suppliers, TIA or tire manufacturers. The illustrations used here were supplied by Hunter Engineering. Recommendations made here are consistent with the basic practices used in the industry. This article is meant purely for educational purposes and those who use the methods recommended are solely responsible for any injuries or losses resulting from their application.