Back to Basics 2: Step-by-Step Tire Demounting/Mounting

Back to Basics 2: Step-by-Step Tire Demounting/Mounting

The second installment in our Back2Basics series looks at an essential part of the tire sales and service process: demounting an old tire and mounting a new one on the customer's vehicle.

tire chan­ging is dangerous and should be done by trained personnel using proper tools and procedures.

Read and understand warnings published by tire changer manufacturers, tiremakers and wheel suppliers, whether the information is on a placard adhered to the machine or on the tire sidewall or in support literature for a wheel. Failure to comply with these warn­ings may cause or create problems that could result in injury, or worse.

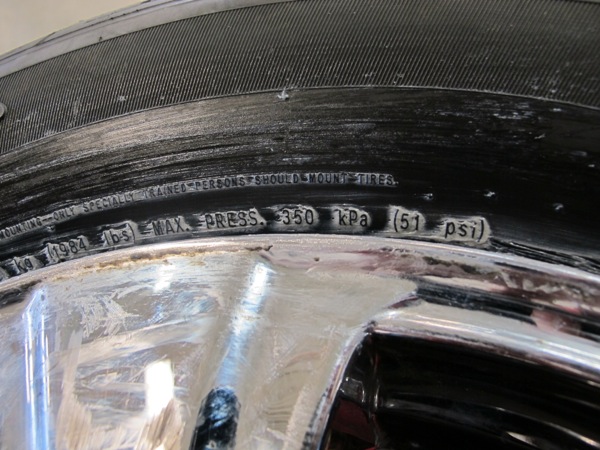
Any radial tire suspected of operating under- or overinflated or over loaded must be app­roach­ed with caution. Ply cords weakened by under- or overinflation and/or over loading may break one after another, until a rupture occurs in the sidewall with explosive force. Obviously, this can result in serious injury or death.

Never, under any circumstan­ces, introduce a flammable – ether, propane, lighter fluid, gasoline, etc. – substance into a tire when trying to seat the beads.

Silicone-, petroleum- or solvent-based lubricants must not be used. These substances may cause the tire to slip on the rim; have a harmful effect on the tire and/or wheel; or create explosive mixtures of air and vapors in the tire that may result in serious injury or death.

When servicing tires and wheels, tire service professionals should always wear the appropriate personal protective equipment (PPE), including safety glasses, work gloves, hearing protection and leather work shoes or boots.

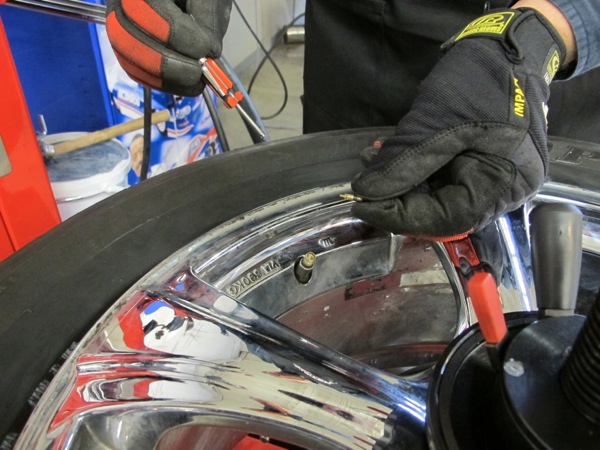
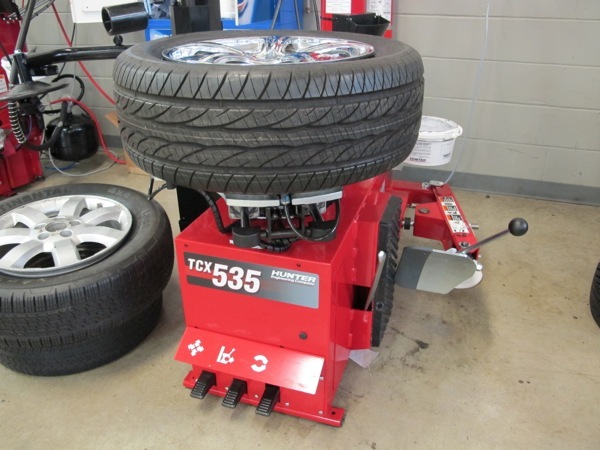
Step-by-Step Tire Demounting/Mounting Procedures

The following “how to” photos and captions show and explain the basic procedures for demounting and mounting tires. The process demonstrated here assumes the tire/wheel assembly has standard rubber valve stems and not stems with TPMS sensors. Under­stand that each tire changer manufacturer has specific steps for its unique equipment. Make sure you follow those specific procedures as required. Additional information about mounting/demounting tires is available on RMA’s website – rma.org – by requesting its Demounting and Mounting Procedures wall chart, or by requesting information from TIA – tireindustry.org – for its Automotive Tire Service training Module 8 on Demounting, Mounting and Inflation.

To download a PDF of this information, click here.
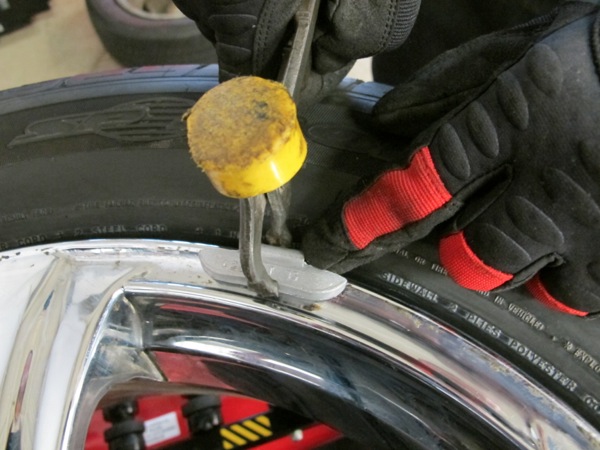
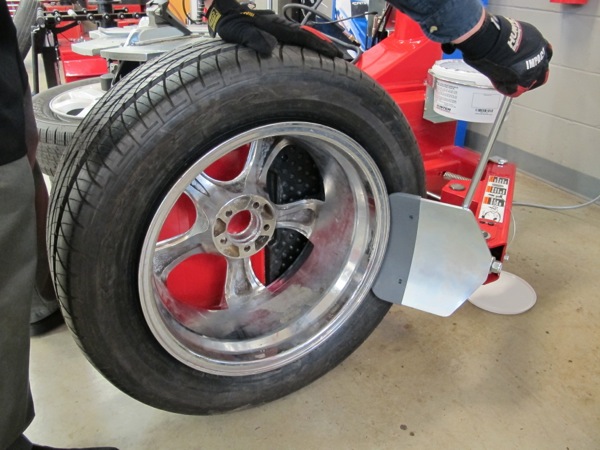
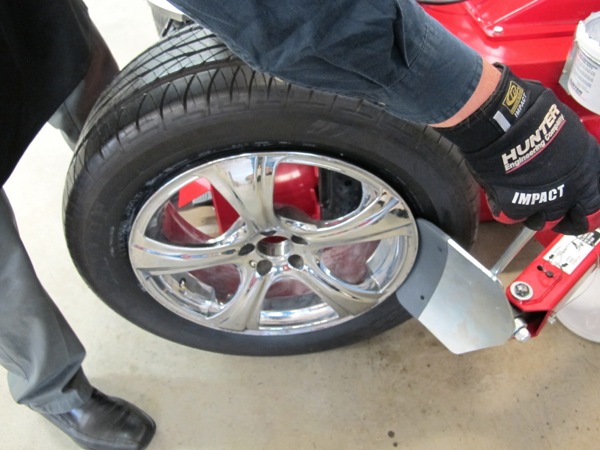
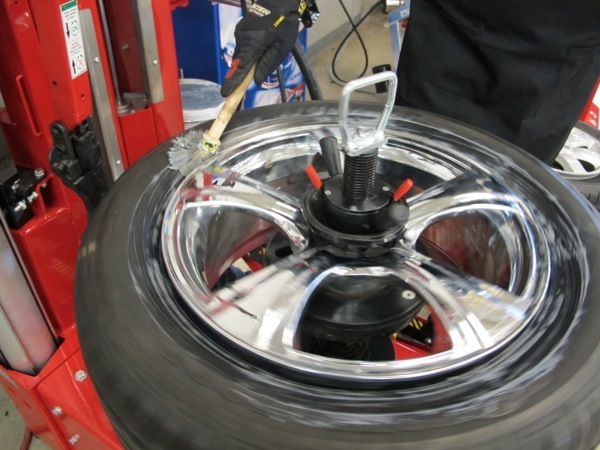
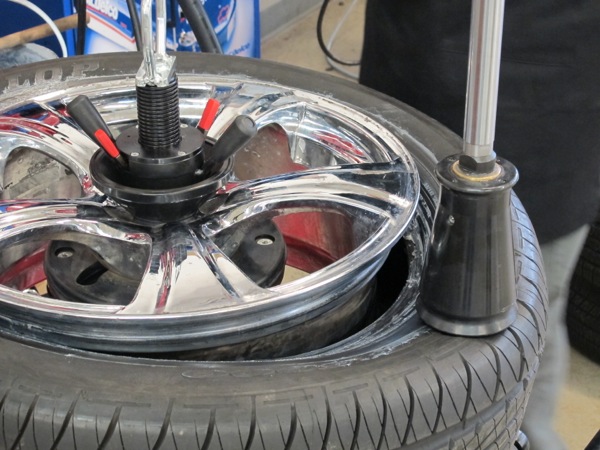
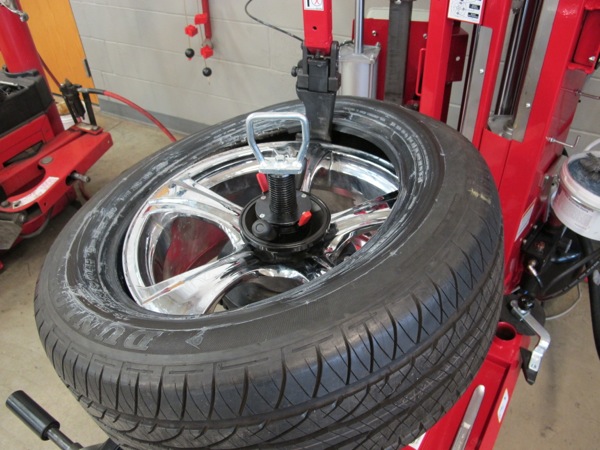
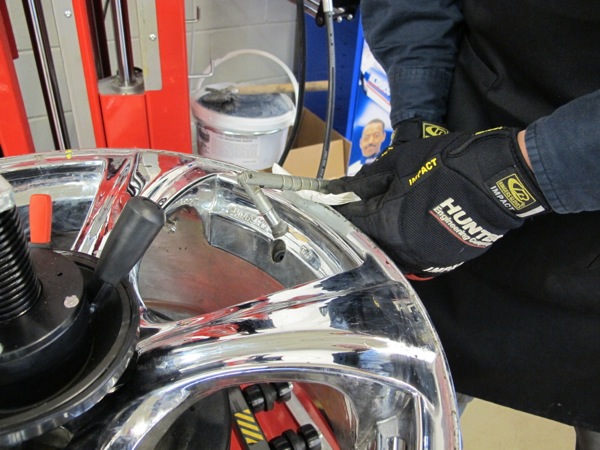
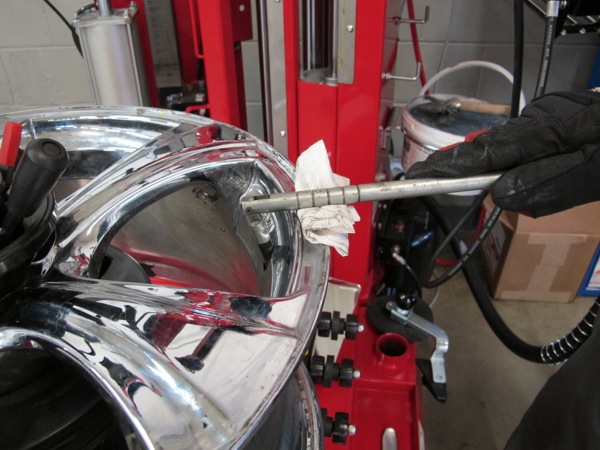
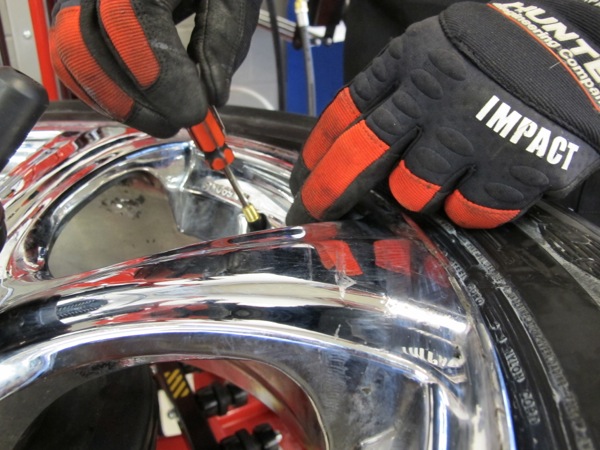
Demounting Steps
Before doing anything, identify the type of wheel and if there are any special handling issues.
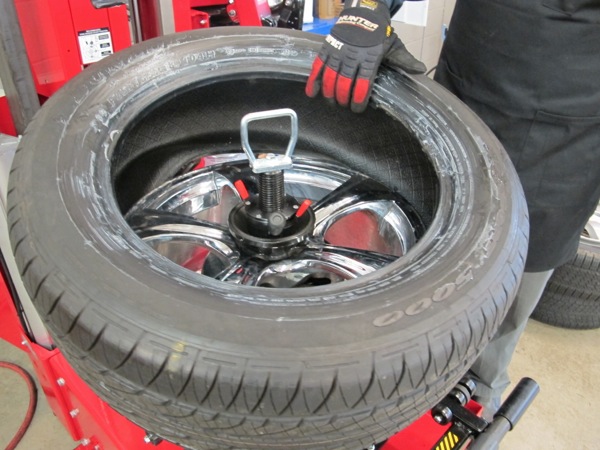
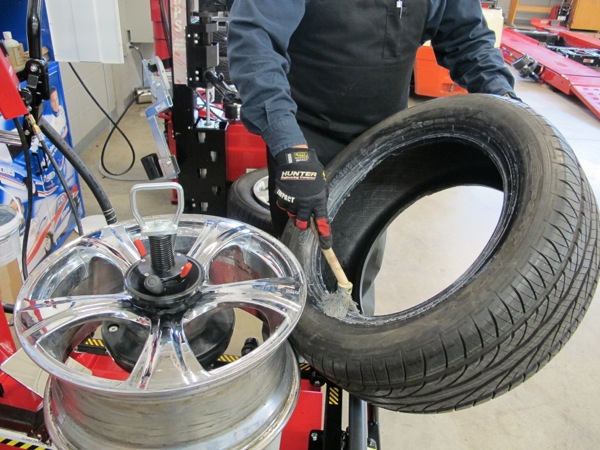
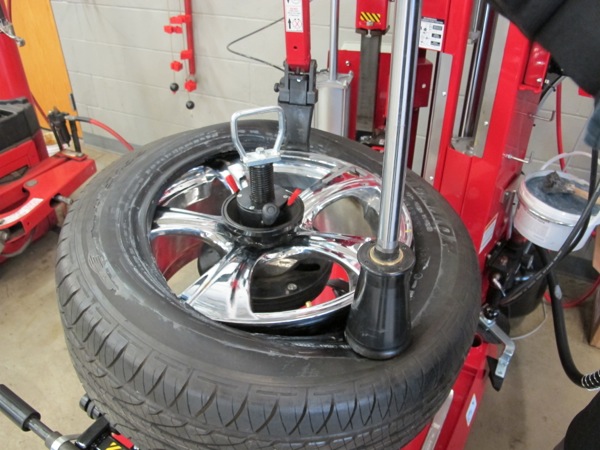
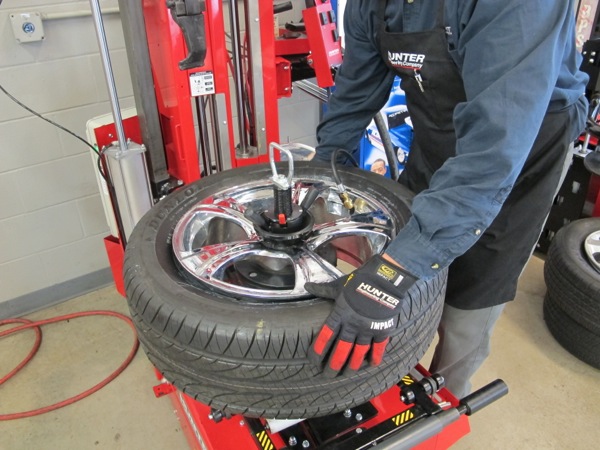
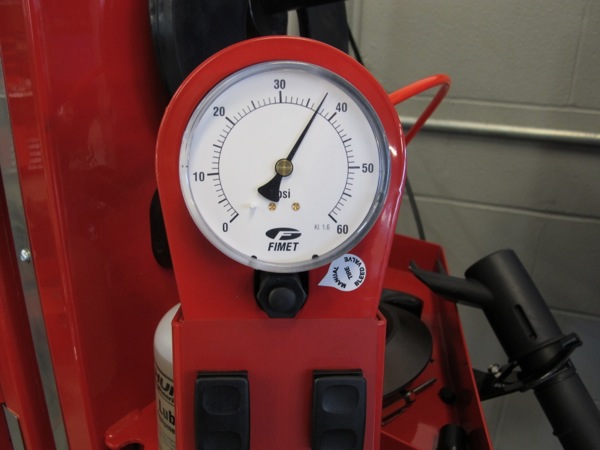
1: after positioning wheel assembly on tire changer, remove valve core. (note core in technicians fingers.)2: remove any wheel weights, again being careful not to damage wheel.3: use breaking shovel to unseat the top bead.4: turn tire/wheel assembly around and repeat using the shovel.5: secure assembly on tire changer. in this photo, the assembly is on a tabletop or rim clamp style changer.6: here the assembly is being mounted on a center post style changer. make sure to properly position the assembly on the center post when using that type of changer.7: lubricate top bead.8: break top bead by pushing down using the changers unique tool.9: use the changers lever to slip the top bead over the rim flange.10: lift bottom bead over rim flange.


Tire Mounting Steps

1: make sure the tire size matches the wheel diameter and width. after securing wheel to changing machine, check wheel for damage of any type. also double check to see if the tire has a directional tread.

2: remove old rubber valve stem, being careful to not damage the wheel. this particular tool breaks the rubber stem into two pieces; make sure to remove the other piece from inside the drop center of the wheel.

3: install a fresh rubber valve stem, again taking care to not damage the wheel.

4: lubricate the inboard and outboard bead areas.

5: place tire on wheel and with a lever securely in place, twist the tire bead over the top rim flange by hand.

6: you may need to use the changers mechanical lever to complete this step.

7: install a new valve core.

8: identify the maximum air pressure for the tire. you will need that information to properly seat both beads using air pressure.

9: seat both beads using air pressure and a gentle lift of the tire up into the top rim flange.

10: Find the proper inflation pressure for the tires on the vehicle placard located in the drivers door jamb or the vehicle owners manual. Inflate the tire to that pressure. For uniformity, deflate and then inflate again.  

Disclaimer
Demounting and mounting tires is a serious business. The preceding article was researched and written using existing material from Hunter Engineering, RMA and TIA. This information is NOT meant as a substitute for proper training by TIA or by the equipment manufacturer. The photos were taken with the participation of Hunter Engineering at Stark State College. The process shown here is consistent with those used by other major tire changer manufacturers, but consult their specific equipment use procedures and instructions. This article is meant purely for educational purposes and those who use the methods recommended are solely responsible for any injuries or losses resulting from their application.

You May Also Like

Tire Industry Labor Shortage: Improve This to Keep Employees

I’ve spoken to many representatives from manufacturers, wholesalers and retailers who report that techs, counter people, drivers and even white-collar team members have walked off the job, failed to report, or given notice, and their businesses have been impacted by these departures. This isn’t just a tire industry issue—and goes beyond the tech shortage that

Tire Industry-Labor Shortage-Great-Resignation

I’ve spoken to many representatives from manufacturers, wholesalers and retailers who report that techs, counter people, drivers and even white-collar team members have walked off the job, failed to report, or given notice, and their businesses have been impacted by these departures. This isn’t just a tire industry issue—and goes beyond the tech shortage that has plagued the industry for decades.

Consider Software Solutions to Streamline Operations

Representatives from several software providers share how solutions drive efficiency and profitability, as well as what to look for when considering a system in your shop.

software-solutions-stock
How Data, Analytics Can Boost Profitability for Tire Retailers

By collecting and analyzing data about a dealer’s sales history, inventory levels and market demand, data and analytics platforms can analyze the performance of each dealer’s store and recommend actionable improvement opportunities.

How to Start the PPP Loan Payback Process

For many PPP loan recipients, it is time to start the repayment process—or file for PPP loan forgiveness. Read on to find out which portion of your loan may be forgivable and how to apply for forgiveness, as well as how to start the repayment process.

Creating a Positive Work Environment

Larry Sutton of RNR Tire Express shares seven different practices that have helped him create a positive work environment.

Other Posts

Using Data to Enrich the Customer Experience

Attaching data or a number to a vehicle’s service record adds a level of transparency to the discussion, and moves it from an “opinionated upsell” to a true, fact-based service need.

Coats Tread Depth Data
Microlearning Makes the Tire Industry Smarter, More Profitable

Microlearning modules can be customized to company and team member needs, where participants can learn through their own experiences and at their own pace.

Setting Up for Success: The Importance of Onboarding New Employees

Onboarding serves to not only give a new employee practical information that they will need in the job, but having that information gives them confidence as they start out in their new position.

employee-onboarding
Online Reputation Management

Eighty-eight percent of consumers trust online reviews as much as they trust personal recommendations.

Online-Business-Management